Physical Address
304 North Cardinal St.
Dorchester Center, MA 02124
Physical Address
304 North Cardinal St.
Dorchester Center, MA 02124

Friends, today’s topic is “How to Add Custom Domain Godaddy to Blogger?” If you are serious about blogging then you become a professional blogger! So for this, you need to give a professional look to your blog. And a custom URL is required! So that the visitor can know that this is a Professional Blog! Blogger platform provides you a domain name for free! But Blogspot.com adds its credit to the URL, which does not appear to be a professional URL address!
Today you and our competitors are very much! And we have to work very hard to make our mark on the internet! When an internet user sees your site, the first thing they will look at is your blog URL. And if you are using a free domain then that internet user will not like to visit your blog. The impression of the blog is made only when you have a unique domain name.
Friends, you will find many sites like Bigrock, 1&1, easy DNS, on the internet, to buy a domain name! But I would suggest GoDaddy only! From here you can buy a custom domain for your blog at a very low rate.
Before knowing this, let me tell you that my domain is bought from GoDaddy! To date, I have not faced any problems in managing it. This method is only for those people who want to add the domain purchased from GoDaddy to their blog.
- Step 1. Hope you have already bought from GoDaddy! If not buy then go to the Godaddy site and buy! Go to your Blogger Dashboard >> Settings.
- Step 2. Now click on >> Custom Domain.
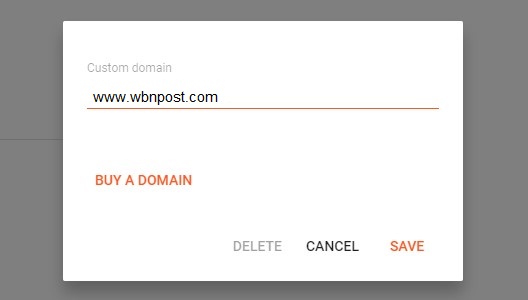
- Step 3. Now a popup will open in which you have to enter that domain URL with WWW must add before the domain like “www.wbnpost.com“. Which you bought from GoDaddy and click on save!

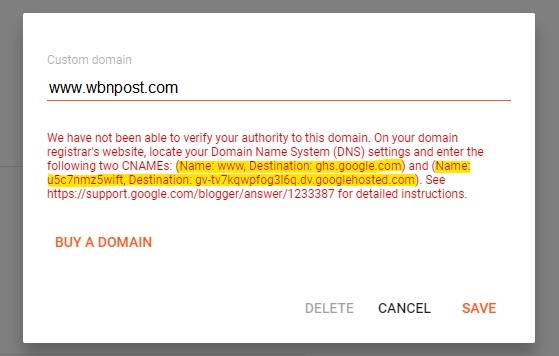
- Step 4. Once you click on save, another popup page will open. Now Name and Destination(Host) will be there (see in red box) Now copy it in notepad and keep it!

- Step 5. Now open a new tab and go to the domain management page of GoDaddy!
- Step 6. Then click on the Manage button next to the domain!
- Step 7. Now click on the DNS button of the domain that you want to add to the blog!

- Step 8. On clicking Add Record, another popup window will open.

- First, select the CNAME
- Enter www in Host!
- Enter ghs.google.com in Point to!
- Let the TTL be 1 hour only!
- Then click on Add Another!
Now again same to the same form will open!
- At this time also select CNAME
- Paste the code in the host which I told you to copy in notepad in the beginning!
- Copy the second part in front of that code in Point to!
- Click Finish Now!
After doing this a form will come in which you have to click on save changes.
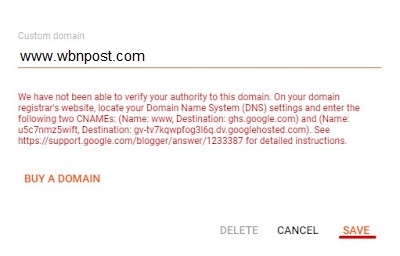
- Step 10. Now come back to your blogger Url settings! And click the save bottom on the page.

Now your complete settings are done! Now to confirm, you can open it once and see for yourself! Still, if the site is not opening on the new domain name! So once check all the settings yourself! Sometimes it can take up to 24 hours for DNS to be updated. So don’t worry, wait for 1 day, even then if it is not opening then contact me once and ask for a solution!
Hope you like this post How to Add Custom Domain Godaddy to Blogger? If you have any questions related to this post, then you can ask me by commenting. And yes, if you like the post then do share it with your friends! via Social Media.